
This page last modified: 30 September 2013
This was my third in a series of three WW2 game against Rhys Batchelor using Keith McNelly's scenario generator played while I was visiting Rhys in August 2013. As with our previous game, the year was 1945, with me using a force taken from the Czechoslovakian 1st Corps: essentially the 1st Infantry Brigade heavily reinforced with tank battalions drawn from elsewhere from the Corps. This time, however, Rhys was using a Paratroop regiment as in our first game.
In setting up the terrain, the theme was a an engagement along the line of low valley. Accordingly, an easily fordable river ran from long edge to long edge, somewhat displaced from the centre to what tuned out to be the left side of the table from my perspective. Rolling hills covered the flanks of the table, especially on the right, where low spurs reached out into the centre of the table. Various villages, woods, tree-belts and hedgerows completed the scene.
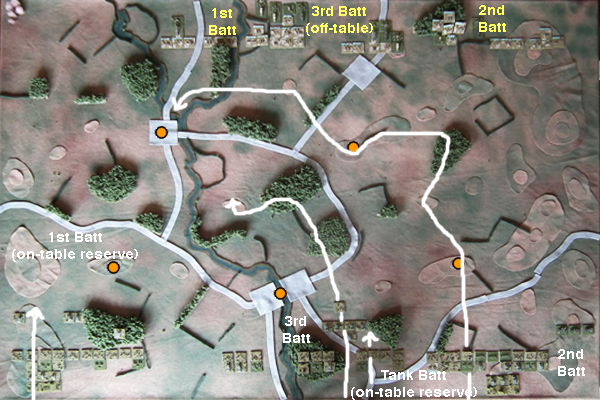
Three of the objectives turned out to be on my side of the table, with the sector missing one being on my right (or to be more accurate, on Rhys' left). The stance was a Mutual encounter, using Attack lists, and I took an A options as before, giving 700 points of troops in total. Rhys deployed with only two battalions on-table, leaving me unsure whether he was keeping a reserve off-table, or planning a flank march. For my part, I put my first battalion, with attached T-34/85s, on my far left, into an on-table reserve position. My second battalion, also with attached tanks, went of my right; its task was to sweep up the side of the board, and then hook around in towards Rhys' centre. Helping it, on the extreme right, was the Corps' mounted recon company: three SMG-armed cavalry elements. Here's how the table looked after at the end of the first turn, with my table edge being at the bottom, the 5 objectives being marked with orange dots, and my initial command arrows being drawn in:
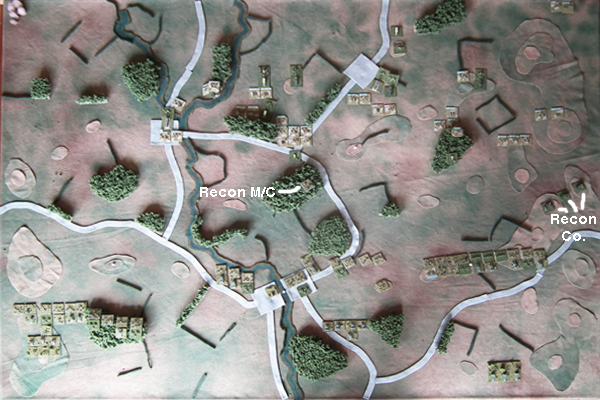
Yet again, my Sturmovik appeared on the second turn, before the enemy's AA assets could be properly position. This time it "only" took out two stands, at the far right of his line (from my perspective), but even two stands of veteran Germans make for an excellent cost-to-kill ratio; this now made 8 kills out of 9 possible for the three games I have used it! By the third turn, we had both advanced sufficiently that our lead elements had spotted each other: on my right, my cavalry had seen - and be seen by - a company of German paratroopers amongst the foothills, while in the centre, my Brigade's recon platoon, an element of SMG-armed motorcyclists, had raced forward and taken cover in the most centrally-positioned of the woods. SMG-armed M/C elements are quite formidable in attack under the WW2 rules, in that they can move some 6" and still shoot - as if stationary infantry! A pity you can only get 1 stand of them in the 1st Brigade.
This central wood was immediately swarming with German paratroopers, including flamethrower-equipped combat engineers. My recon element didn't survive the encounter, but it did halt Rhys' advance here, and the rest of the 3rd battalion was soon counterattacking, with the supporting ISU-152s once again proving their worth in shifting enemy infantry from amongst the cover of woods. Likewise, on my right, HE fire from the T-34s was starting to make an impact by the 5th turn.
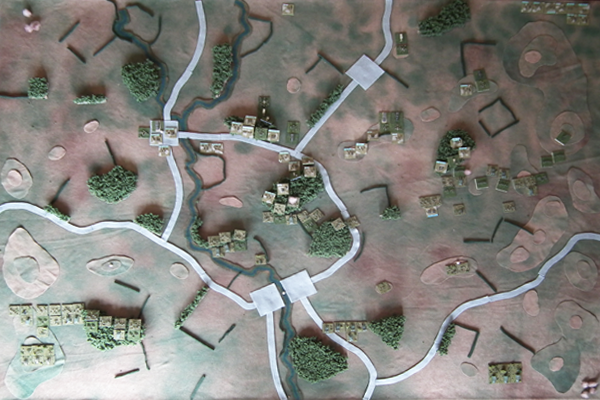
By the end of the sixth turn the game was in a critical stage. Rhys' left was in deep trouble (his AT guns had to continually reposition themselves as my T34s zipped around the place, depriving him of ambush fire shots), so he committed his reserve in an attempt to shore up the inevitable breakthrough. Likewise I committed both of my reserve battalions into the fray. My 3rd battalion had inflicted enough damage on his centre-right that my 1st Battalion should have no problem smashing through it, and on my right, I wanted to exploit the pressure I was exerting there, so I sent my tank riders straight ahead up the table.
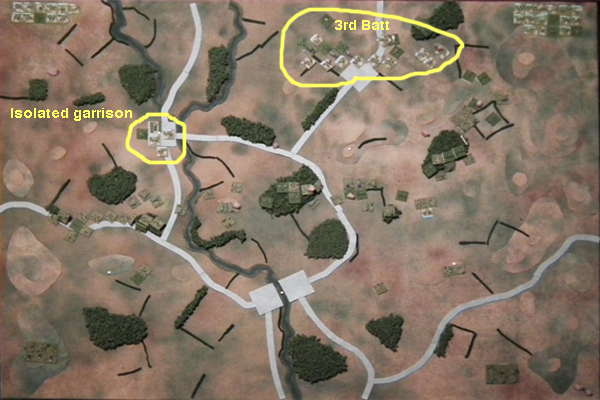
The end of the game came in the 8th turn, just as my reserves arrived on the scene. Both of Rhys' initially deployed battalions had been broken: the first leaving an isolated garrison in the village on my left, and the second in toto, leaving just his reserve battalion as a viable fighting force and me some 10 victory points ahead. Incredibly, I had lost just six elements in achieving this, a truly comprehensive victory that underscored just how a powerful a combination of advancing SMG-stands and heavy armour can be even against veteran infantry. One thing that kept my casualties down was the particularly effective counterbattery fire of my Corps 152 mm howitzers in this game, which quickly neutralized Rhys' 120 mm mortar batteries.
Back to my MSH index.