
This page last modified: 23 September 2013
This was my first WW2 (as opposed to MSH) game against Rhys Batchelor; as usual we used Keith McNelly's scenario generator. The year was 1945, with Rhys using a bunch of German veteran paratroopers, and me using elements of the Czechoslovakian Armoured Brigade Group that in real life spent the entire year besieging Dunkirk. Presumably the siege had gone well. Either that, or something had gone really badly wrong elsewhere on the Western Front!
The terrain was fairly mixed, with scattered hills, woods, and villages, and a stream of no real consequence running down one side of the table. There were various hedgerows that cut down on available fields of fire, but they were not significant obstacles to movement. The terrain was rather makeshift, since I had not brought any over from Japan, and Rhys' was mostly in Wellington (we were playing in Palmerston North); only Rhys' table cloth hadn't been made the day we played the game! The dice roles determined I would be conducting a Hasty Attack, with 3 of the 5 objectives on my side of the table.
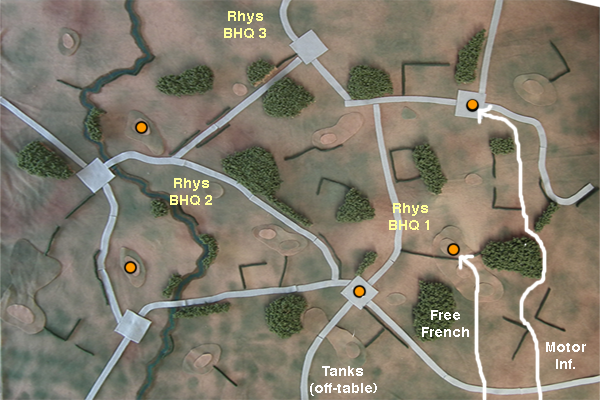
Rhys opted to defend, or at least contest, all the objectives on my side of the table, positioning two battalion HQs well forward, while keeping a third centrally positioned at his rear, ready to move to reinforce whichever of the front two looked to be in most trouble. With 3 BHQs already visible, and him running veteran Germans, with their whopping 1.4 cost multiplier, it was reasonably clear I would at least not have to worry about more of his guys lurking off-table...
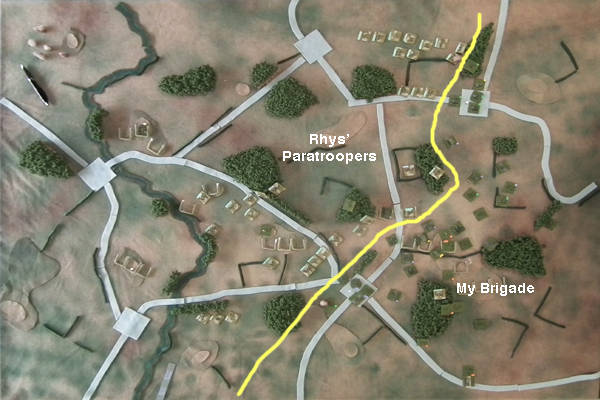
Here's how the table looked after his BHQs were initially positioned, with my table edge being at the bottom, and the 5 objectives being marked with orange dots:
My attacking force also consisted of only three battalions. This was, I believe, the smallest number of units I've ever fielded in a (M)SH game - I'm not used to running forces without a point multiplier bonus! The Brigade Group's Motorised Infantry Battalion, riding in half-tracks, would conduct a sweep up my right flank. Covering its left, and marching on foot, was a battalion of Free French infantry, while a Cromwell-equipped battalion of tanks, the 1st, was held off-table as a reserve, awaiting developments; its entry point was positioned centrally along my rear table edge. The tank and motorised battalions had cross-attached a company each, while the Brigade HQ was attached to the Free French. The tank and motorised battalions each had a single battery (i.e. 2 stands each) of 25 pdr guns in support; a battery of 5.5" guns was available for counterbattery duties; and the whole force had a battery of heavy 7.2" howitzers earmarked for general support (the Free French also had a single 105 mm battalion gun in addition to its 81 mm mortar stand). All 3 battalions totalled either 17 or 18 (morale-counting) elements, giving them all a break-point of 9, being Regular.
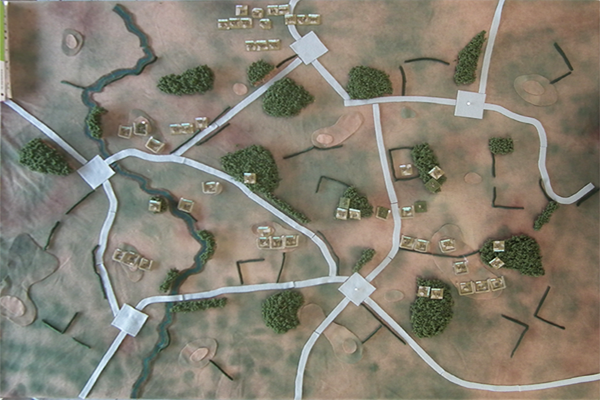
Here's how the table looked half-way through the first turn, after Rhys' force had been fully deployed, but with mine yet to enter the field of play:
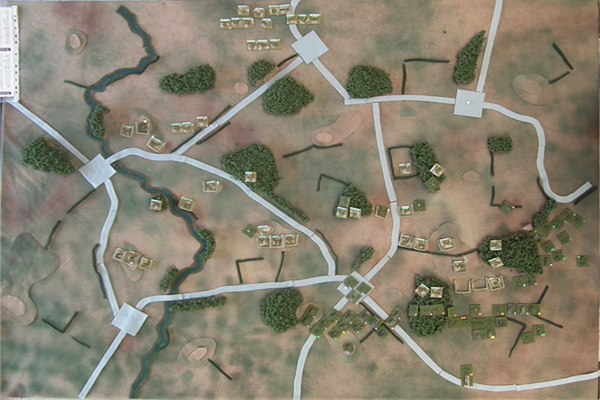
After a couple of turns advancing on Rhys' positions, it was clear there was no way I was going to be able to take the first objective in front of my right in any reasonable time frame without throwing my third battalion into the mix, so I moved it on-table in the third turn. As can be seen below, my motorised battalion has started to outflank the initial German defenders on my right, but since they were dug-in, shifting them was not going to be easy.
During the 4th turn, the battle for the hill-top objective really started to heat up. Getting rid of dug-in veteran infantry isn't easy, because just scoring suppression hits on them is hard enough, and they rally from suppression easily... The close-support Cromwell tanks proved some worth here, but overall, the tanks were very disappointing - Cromwell IVs lack not only a big gun, but more importantly, given a 1945 time frame, armour of any worth, so they are very vulnerable to bog-standard 75 mm AT guns.
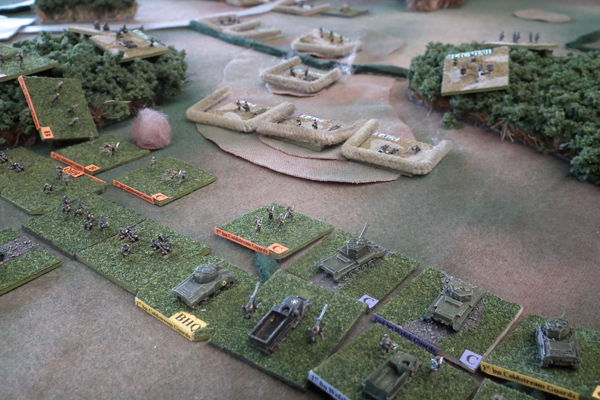
Here we see my guys forming up to assault the objective hill. Not close assault mind you, because that is a very tough propositions against dug-in veterans indeed. One of Free French elements, on the left, has been suppressed, and Rhys' defending company is as yet unperturbed. I was borrowing the troops for this battle from Rhys' extensive collection. I'm generally not a fan of on-base labels like he has, but it certainly aids in packing them away in an orderly manner after the game. My guys have a label written underneath their base, necessitating picking them up and turning them over to see which unit they come from... That can be a bit of a chore, but to my mind the visual bonus is worth it.
During the 4th turn, Rhys had also started moving his reserve battalion across to meet my flanking motorised infantry. My lead elements had seized the objective village, but they had taken a lot of casualties in the process of moving round his forward battalion. By the end of the 5th turn, I still hadn't even finished dislodging the remaining elements of his paratroopers on the initial hill objective, despite throwing in the full force of both the Free French and the tank battalion - I just didn't have enough assets to get hits on his guys fast enough.
Here's the scene at the end of the 6th turn. By now all three of my battalions had taken heavy damage, and any further combat would risk any - or all - of them breaking. I'd broken one of his battalions, but the other two were essentially undamaged, and closing in on my weary troops, as fast as his guys could leg it to my positions. Of the three objectives I had seized, two were already being contested (and I had no real hope of holding them), and it would have been only a matter of time after having take them before Rhys then re-contested the third. With a clear victory to him in the offing, I threw in the towel.
I found that this British-equipped Brigade simply didn't have the tools necessary - or perhaps as pertinently, the numbers for that matter - to take on all the paratroopers they were up against. If the game had continued, it would have been, at best, a 2-7 defeat for me, and possibly a lot worse. More expensive man-for-man than Soviets, British-types like these guys need to make the most of their advantages. Unfortunately, those advantages seem to be rather few. Their artillery is... average (decent responsiveness, but doesn't pack much of a punch at all); their infantry, are mediocre (with no SMG companies to give them some better attacking options like say the Soviets); and while their air superiority could be decisive, against dismounted infantry like paratroopers, Typhoons don't have an ideal set of targets to bust up. I doubt I'll be investing in buying the gear to run these guys again in the future - it seems like an exercise in frustration. No doubt some experience used of Commonwealth troops could put me in the right direction on how to maximize these guys' effectiveness.
Back to my MSH index.